
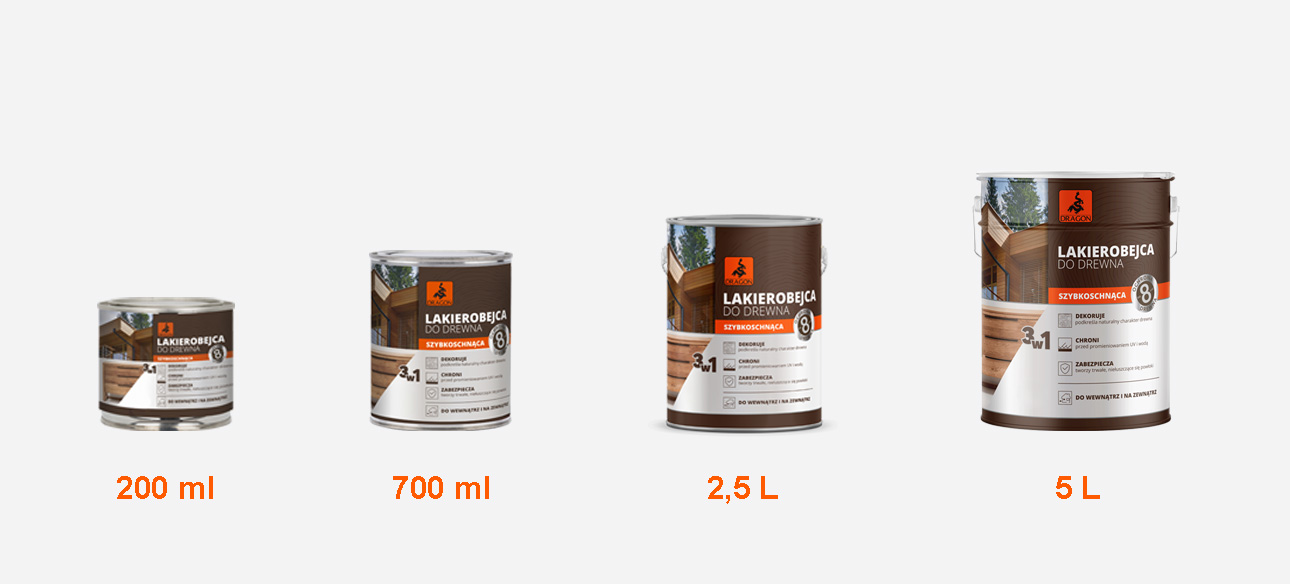
Dostawa od 10,99 zł
Zamów w przeciągu 02:21:32 a wysyłkę otrzymasz jutrowhite 700ml
white 700ml
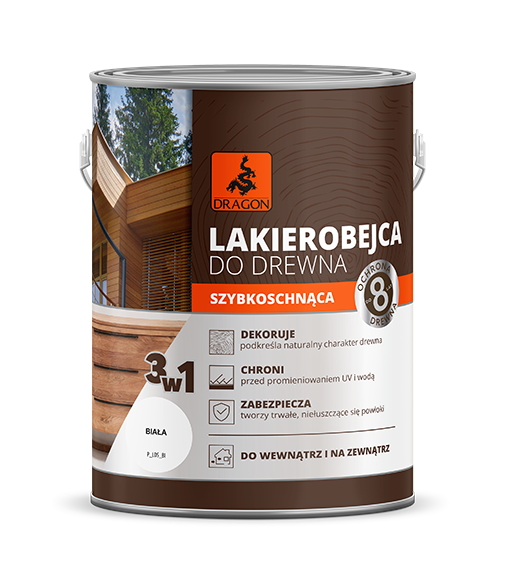
 8 years wood protection
Quick-drying Dragon Varnish is a high-quality protective and decorative product for wood protection both indoors and outdoors.
The advanced 3-in-1 formula makes it an ideal choice for wood impregnation, giving years of colour and protection.
Product available in stores
white 700ml
Quick-drying Dragon Varnish is a high-quality protective and decorative product for wood protection both indoors and outdoors.
The advanced 3-in-1 formula makes it an ideal choice for wood impregnation, giving years of colour and protection.
8 years wood protection
APPLICATION:
Product intended for decorating and protecting wooden elements both indoors and outdoors.
Sample application sites:
⚠️
Przeznaczona do:

na zewnątrz

Altany

Bramy

Ogrodzenia

Meble ogrodowe

Domki Drewniane

Pergole

do wnętrz

Okna

Meble
Boazerie

Półki

Drzwi

Drewniane dekoracje


Dostępne kolory
Find out how to take advantage

- 1 Ensure the surface is healthy, degreased and smoothly sanded, clean, dry.
- 2 Clean the fungus-infected item down the raw wood or replace it with a new item.
- 1 If there is an old layer of lacquer, paint, or wax on the wood, it should be removed with a suitable paint stripper or sandpaper.
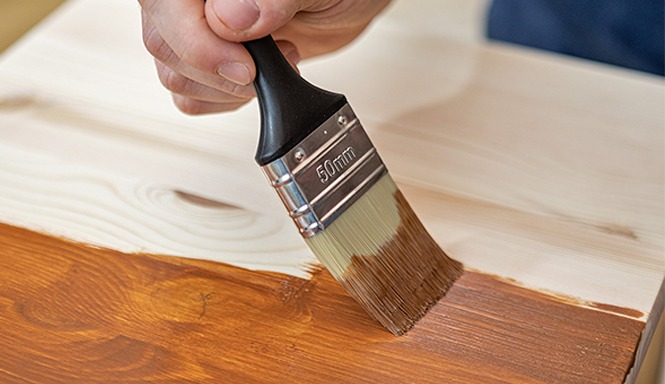
- 1 Mix the product thoroughly before use.
- 2 Use a brush to apply a thin layer along the wood grain.
- 3 Apply 2-3 coats.
- 4 After the first layer dries, sand with fine-grained sandpaper (type 240g) and carefully clean the surface of dust.
- 5 Tightly close the package after finishing work.
- 1 Ensure the surface is healthy, degreased and smoothly sanded, clean, dry.
- 2 Clean the fungus-infected item down the raw wood or replace it with a new item.
- 1 If there is an old layer of lacquer, paint, or wax on the wood, it should be removed with a suitable paint stripper or sandpaper.
- 1 Mix the product thoroughly before use.
- 2 Use a brush to apply a thin layer along the wood grain.
- 3 Apply 2-3 coats.
- 4 After the first layer dries, sand with fine-grained sandpaper (type 240g) and carefully clean the surface of dust.
- 5 Tightly close the package after finishing work.
- 1 Ensure the surface is healthy, degreased and smoothly sanded, clean, dry.
- 2 Clean the fungus-infected item down the raw wood or replace it with a new item.
- 3 Mix the product thoroughly before use.
- 4 Use a brush to apply a thin layer along the wood grain.
- 5 Apply 2-3 coats.
- 6 After the first layer dries, sand with fine-grained sandpaper (type 240g) and carefully clean the surface of dust.
- 7 Tightly close the package after finishing work.
Surface preparation:
Wood preparation:
Removing old coatings:
APPLICATION:
Surface preparation:
Wood preparation:
Removing old coatings:
APPLICATION:
Surface preparation:
Wood preparation:
Removing old coatings:
APPLICATION:
Surface preparation:
Wood preparation:
Removing old coatings:
APPLICATION:
No usage data available for this product.
- Before starting work, paint a small test sample to check the shade is as desired.
- To obtain a darker shade, we recommend applying three layers at intervals of approximately 4 h.
- To protect raw wood, apply 3 layers of varnish.
- Work at a temperature of (5÷30)°C.
- The coating is fully ready after a minimum 24 h.
- The product colour shown on the packaging sticker is a guide.
- Use the paint samples available in the store to select the colour desired.
- When painting larger surfaces, we recommend using products from the same production batch.
- The final effect of the paint job (gloss level and color) depends, among other things, on the method of application, the degree to which the surface is sanded, the type of wood, its natural color, absorbency, and moisture.
No read before use data available for this product.
Really simple

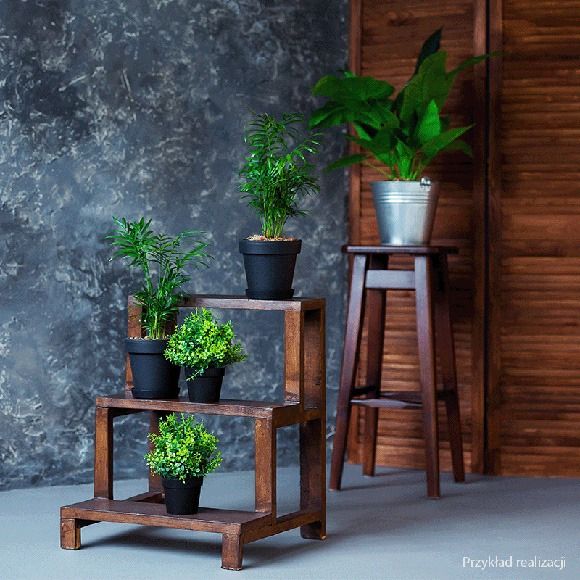
Strefa inspiracji
inspiracje jak wykorzystać lakierobejcę do malowania drewna


Technical data
| SKU | |
|---|---|
| Ean | |
| Grammage | |
| Protection effectiveness | 8 years |
| Maximum efficiency | 15m²/L |
| Applicability | interior or exterior |
| Type of finish | satin |
| Initial hardening/drying time of the joint/coating | 20min |
| Typ produktu | water-based on styrene-acrylic dispersion |
Security
- Avoid contact with the skin - stains permanently.
- Keep out of reach of children.
Storage and transport
- Store and transport in tightly closed, original packaging at a temperature of (5÷30) °C.

Lets take care of the environment
VOC:
Category A;
subcategory e: Varnishes for painting interior or exterior finishing elements and wood stains, including opaque,
WB type,
the maximum permitted VOCs are 130 g/L,
the maximum VOC in the product is 30 g/L.
